We require a Google Earth .kmz or .kml map file for most air photo orders in order to perform the search accurately. A kmz file can be easily created on Google Earth in minutes and we have created a brief tutorial to walk you through the necessary steps.
To view or download this tutorial as a PDF file click here.
1. Download and install Google Earth
Google Earth can be downloaded for free at:
https://www.google.com/earth/desktop/
2. Open Google Earth. Draw & indicate your area of interest
Zoom onto your site in Google Earth (or enter a city/address onto the search bar on the left, e.g. 1984 West Mall, Vancouver). You may use either the Add Placemark, Add Polygon, or Add Path tool to indicate your site.
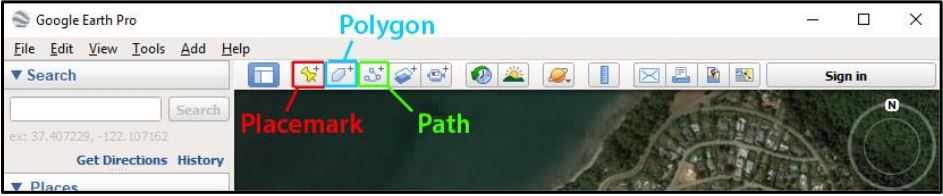
You can move and adjust the pinpoint to place it directly on your site. Once you are satisfied with the placement of the pinpoint/polygon/path, click OK on the dialog box to close it.
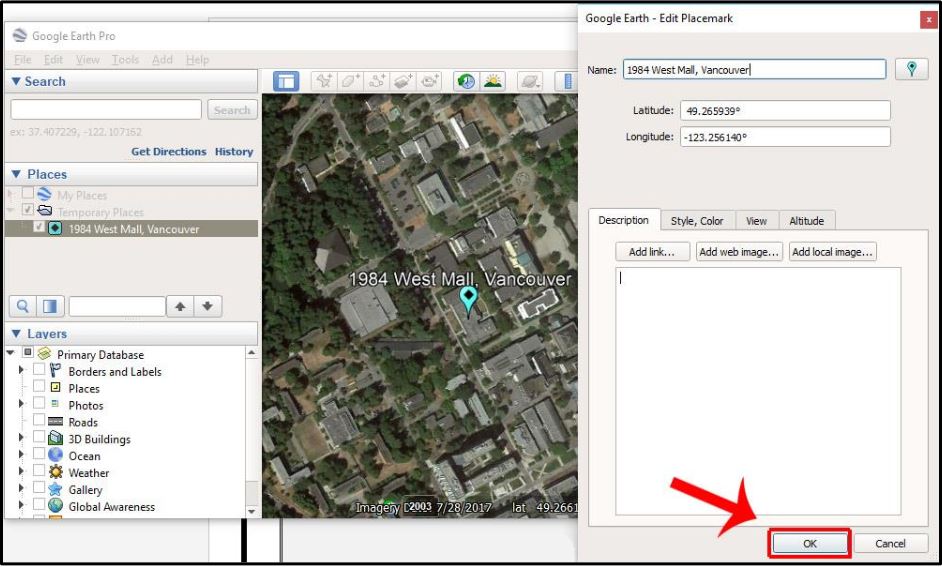
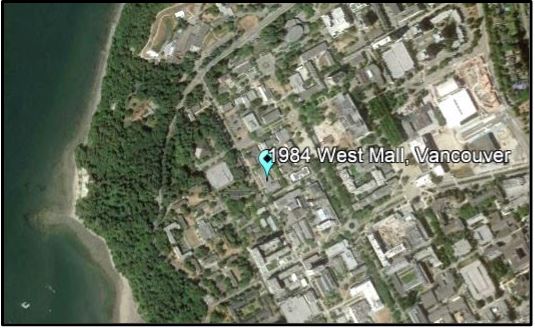
Add Placemark tool example
For sites with a specific address:
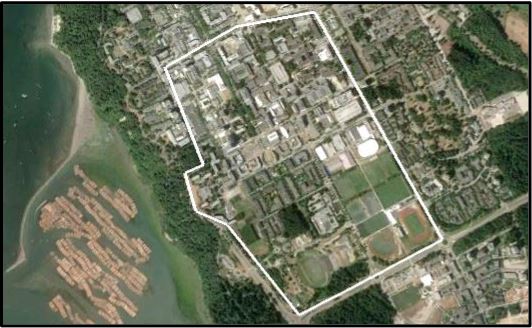
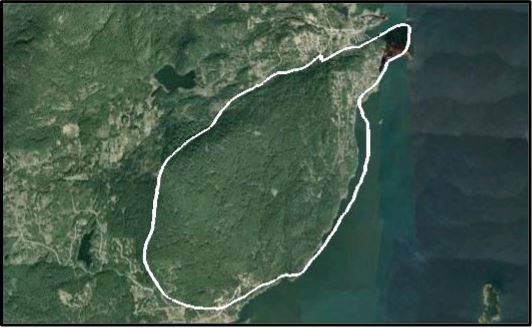
Add Polygon tool examples
For multi-block or remote area sites without an address:
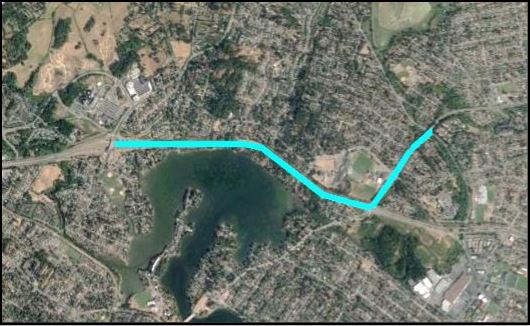
Add Path tool example
For highways, powerline, rivers, etc:
2. Saving the file
Once the pop-up dialog box has been closed, there should now be a new layer of the feature under the Places sidebar.
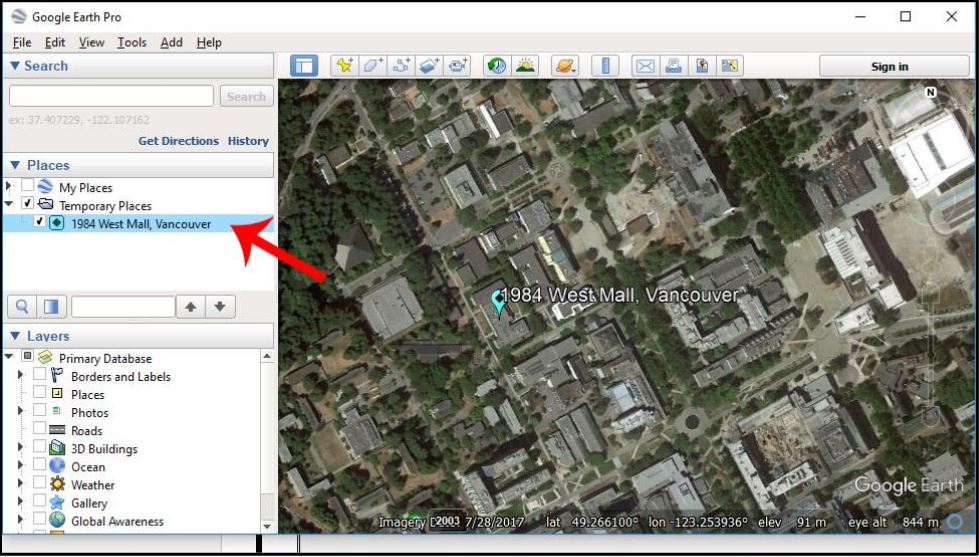
Right-click on the layer and choose “Save Place As”.

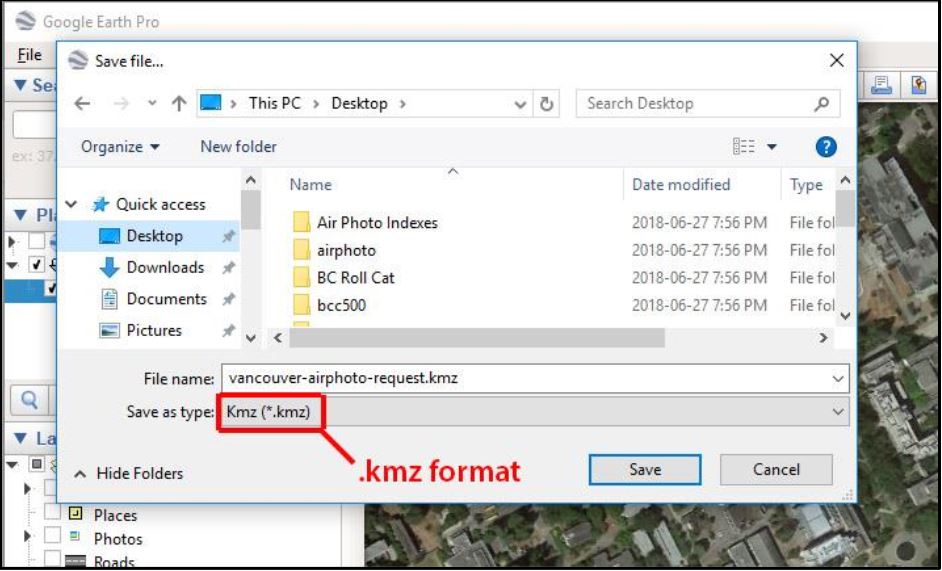
Name and save the file to your desired destination. Make sure to save as type Kmz.
Bonus: Multiple sites in a single kmz file
If your project requires air photos of many locations, it might be easier to save them all as one single .kmz file.
Draw all of your sites as shown above:

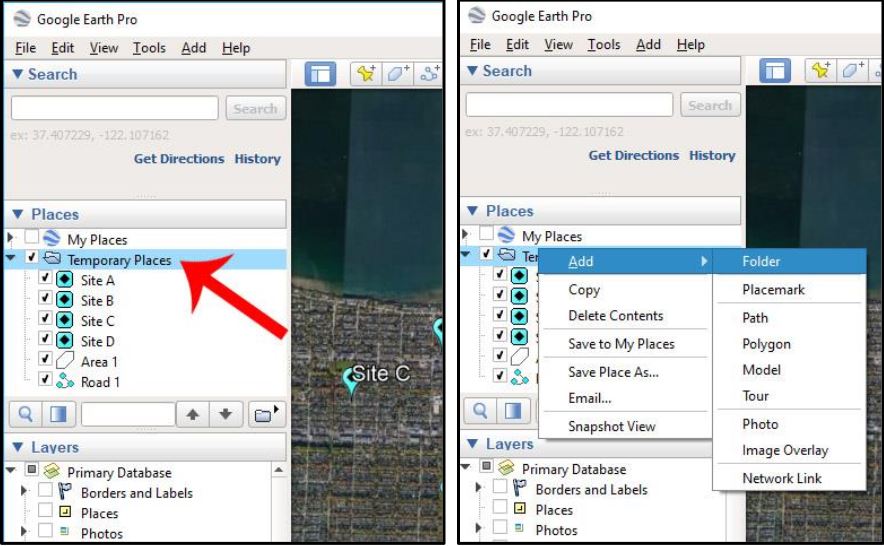
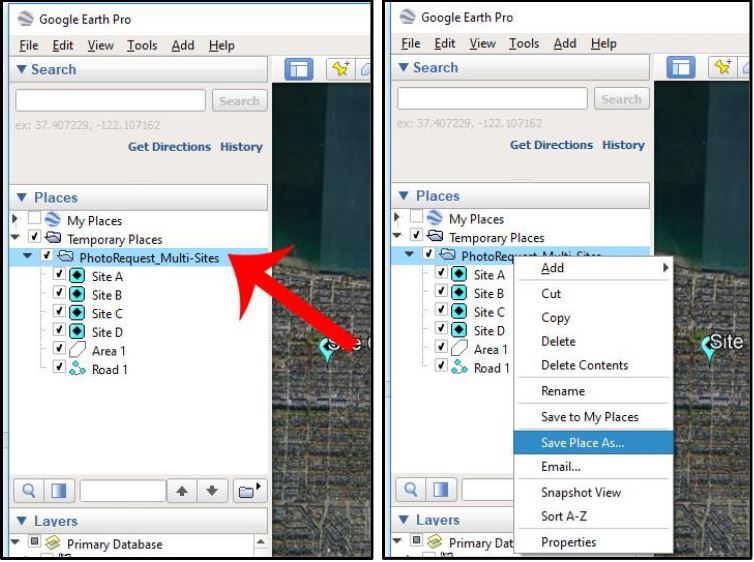
Under the Places sidebar, right-click on the “Temporary Places” folder. Choose Add > Folder:
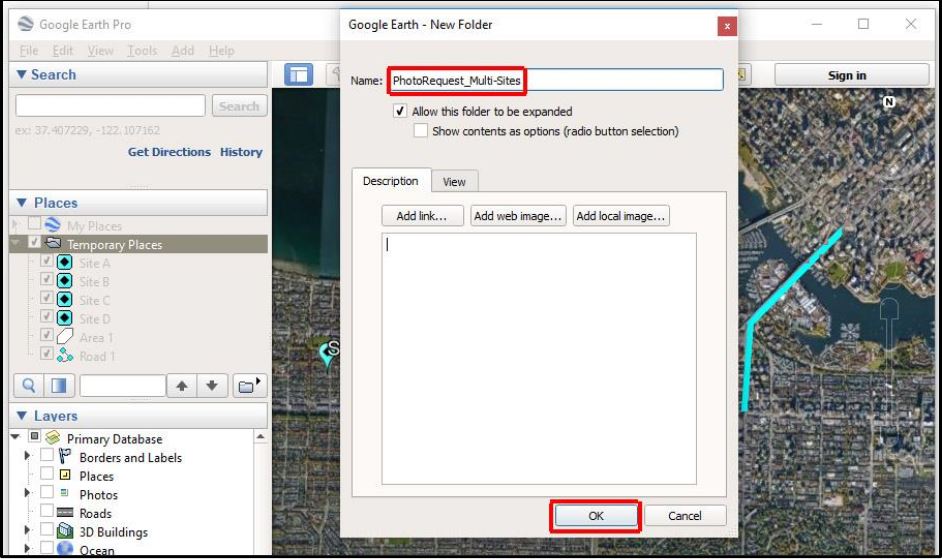
Enter a name for the new folder, and click OK on the dialog box
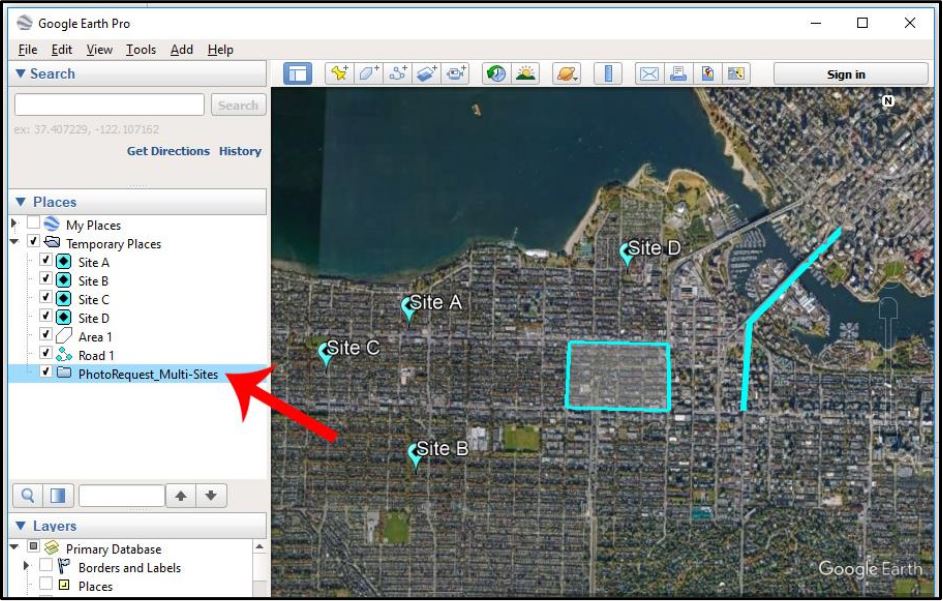
Your new folder should appear under the Places sidebar.
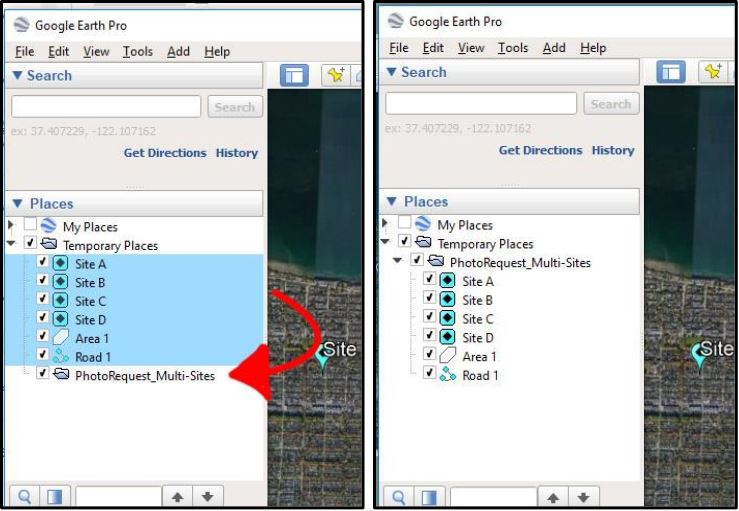
Select all your feature layers (hold down CTRL on keyboard to select multiple layers at once) and move/drag them into the new folder. All the feature layers should appear inside the folder in the files tree:
Right-click on the folder name and choose Save Place As.
This way all the sites should now be saved within one single .kmz file.